How to Shoot in First Person Basketball
Release timing, fadeaways, hop steps, and first-person aim that holds up online.
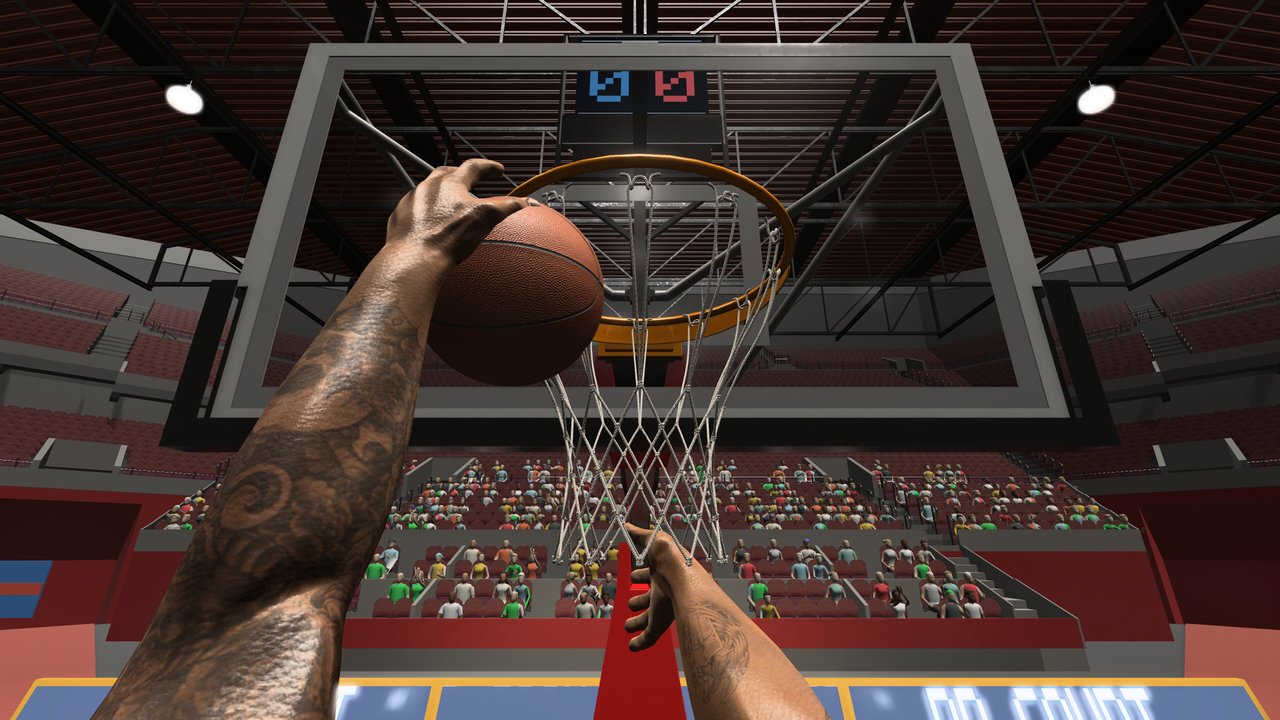
Shooting in First Person Basketball is a first-person timing problem, not a third-person arcade meter you watch from over the shoulder. You aim with the mouse, create space with WASD footwork, and rise with Space. The Steam release from 纸上谈兵工作室 (app 5478590, November 4, 2026) highlights fadeaways and hop steps as part of the offensive toolkit alongside crossovers. This guide teaches a repeatable shot process for practice, AI, and online 1v1–5v5.
If bindings still feel foreign, skim Controls first. If the rim slides while you rise, fix camera choice in Camera Settings before blaming your release.
The shot pipeline
Break every jumper into four beats:
- Create — Use a crossover, a hard A/D strafe, or a hop step to get a clean window.
- Square — Mouse the rim into a stable spot in your view. Do not start the gather while the rim is still sliding across the screen.
- Rise — Tap Space with a loaded base. Early jumps shorten your aim window; late jumps invite blocks.
- Release — Finish the shot input on a consistent personal count. Consistency beats copying someone else’s rhythm blindly.
Practice this pipeline on an empty court until the four beats feel like one motion. Then add AI contests so beat one (Create) actually matters.
First-person aim habits
In first person, the rim is a moving target relative to your head and jump. Helpful habits:
- Pick Stable Camera while learning. After the November 5, 2026 patch, Stable is the default for a reason — it keeps the frame calmer through the rise. Dynamic remains in Settings for players who want more motion once timing is solid.
- Settle the cross-court turn before you shoot. Spinning with the mouse and releasing in the same instant is how bricks happen.
- Use the backboard as a depth cue on midrange angles when the rim alone feels hard to judge.
- Lower sensitivity slightly for shooting blocks, then raise it again for defense. Many players keep one “aim” comfort zone and accept slightly slower help rotations.
Hop step into the jumper
Hop steps give you a gathered plant so the rise feels intentional. On the perimeter:
- Approach with controlled WASD speed — not a full panic sprint.
- Trigger the hop step to load your base.
- Square the rim with the mouse during the gather.
- Space into the jumper and release on your count.
Hop steps are ideal when a defender expects a straight-line drive. You threaten the paint, then stop into a shot they are late to contest. Drill ten hop-step jumpers from each wing in practice before you try them online.
Fadeaways without losing the rim
Fadeaways create space when you cannot step through. The tradeoff in first person is visibility: as you lean away, the rim drifts. Mitigations:
- Start the fade only after the rim is already framed.
- Prefer Stable Camera until fadeaways feel readable.
- Use fadeaways as punish tools when a defender over-closes, not as your only shot type.
- Mix a normal pull-up so opponents cannot sit on the fade.
Empty-court fadeaway drills teach the lean. AI drills teach when the fade is necessary versus greedy.
Open vs contested looks
Open look — Defender is out of stance or trailing. Take your normal pipeline. Do not rush just because the lane feels free; rushing open shots is a common online leak.
Contested look — A hand is closing. You can fade, hop into a new angle, pass (in larger than 1v1 modes), or drive instead. Forcing a bad Space rise into a block trains the wrong lesson. Practice “shot fake into drive” patterns even with the simple WASD + Space kit so you are not binary.
Steals and blocks exist on defense — assume good opponents will time them. Your job on offense is to make their Space jump early or late.
Midrange, paint floaters, and threes (practical ranges)
Without inventing hidden attribute menus, think in court geography:
- Paint finishes — Often better as layups or dunks; see How to Dunk. If you settle for a push shot in traffic, square early and accept contact timing.
- Elbow / wing midrange — Best classroom for hop-step pull-ups. High repetition zone.
- Deep perimeter — Demands cleaner create-and-square beats because depth error grows with distance. Earn these shots in practice percentages before spamming them in 5v5.
Track makes in blocks of ten. If you are under a personal comfort percentage from a spot, stay there another five minutes instead of roaming.
Shooting versus AI
AI sessions exist so you can learn contests without lobby ego. Goals:
- Hit open hop-step jumpers under light pressure.
- Take five intentional fadeaways and note how many stayed on line.
- Punish AI over-helps with a simple drive when they bite on pump threats.
When you can score without panic in AI, move online. Warm up with a short practice shooting set every session — even five minutes — before multiplayer queues.
Online shooting priorities (1v1–5v5)
1v1 — Isolation shooting rules. Your crossover and hop step must create the look. Misses are on you; that is good feedback.
2v2–3v3 — Extra bodies mean help defense. Take the first good look you create; over-dribbling into traffic kills possessions.
5v5 — Spacing matters. If a teammate already dragged help, catch and shoot with a quick square-and-rise. Hero fadeaways into crowds are entertainment, not strategy.
November 5 improved online scoring replays — use those replays to study whether your release was early, late, or aimed off. Reduced multiplayer overhead from the same patch should make sessions feel cleaner while you focus on timing.
Linking footwork, camera, and release
Shooting fails when players change three variables at once. Isolate:
- Week focus A: only hop-step jumpers on Stable Camera.
- Week focus B: only fadeaways on Stable Camera.
- Optional later: revisit the same spots on Dynamic Camera.
Document what percentage feels “playable” for you. Share language with friends using this page and Controls so callouts stay consistent.
Common shooting mistakes
- Releasing while still turning the mouse hard across the rim.
- Jumping with Space before the gather finishes.
- Spamming fadeaways when an open hop-step pull-up is available.
- Learning exclusively in chaotic 5v5 lobbies.
- Ignoring Stable Camera defaults after November 5 and fighting motion sickness plus aim error together.
- Never reviewing scoring replays after the patch that improved them.
25-minute shooting workout
- 5 min — Stationary catch-and-shoot rhythm (square → Space → release).
- 5 min — Hop-step jumpers from right wing, then left wing.
- 5 min — Fadeaways from the elbows.
- 5 min — AI contests; only take shots you create.
- 5 min — Free choice online 1v1 focusing on two shot types.
Stop while focus is high. Tomorrow, repeat the weakest block first.
Related guides
- Getting Started — Install and first-hour flow.
- How to Dunk — When to finish at the rim instead of pulling up.
- Camera Settings — Stable vs Dynamic for aim clarity.
- Multiplayer — Applying shots in live games.
- Guides Hub — Full tutorial index.
Shooting skill in First Person Basketball is earned in quiet practice, stress-tested against AI, then proven online. Keep the pipeline short, keep the rim framed, and let November 5’s Stable default and clearer replays help you learn faster — no codes, no scripts, just reps.
Frequently Asked Questions
Quick answers to the most common First Person Basketball questions.
What inputs do I use to shoot?
Move with WASD to create space, aim with the mouse, and jump with Space into your release. Hop steps and fadeaways are key tools for getting clean looks.
Why do my shots feel harder in first person?
The rim moves relative to your view during turns and jumps. Square the rim before you rise, and consider Stable Camera (the November 5 default) while you learn timing.
Should I practice fadeaways or hop-step jumpers first?
Master hop-step jumpers on open looks first, then add fadeaways as a punish when defenders over-close. Mixing too early creates messy habits.
How do online scoring replays help shooting?
The November 5, 2026 patch improved online scoring replays. Watch them to see if your release was early, late, or aimed off under pressure.
When should I drive instead of shoot?
If you cannot square the rim or a contest is already committed, use WASD to attack the paint and finish or dunk instead of forcing a bad fadeaway.